Why Your Hands Go Numb on the Bike
Handlebar numbness has gotten complicated with all the conflicting advice flying around. Foam grips, wrist braces, expensive gloves — riders try everything except the thing that actually works. As someone who spent the better part of two summers troubleshooting this exact problem, I learned everything there is to know about what’s actually crushing your nerves mid-ride. Today, I will share it all with you.
But what is handlebar numbness, really? In essence, it’s nerve compression — sustained pressure on either the ulnar nerve (pinky side of your palm) or the median nerve (runs through the center). Both pass directly under the heel of your hand where it sits against the bar. But it’s much more than that. It’s a fit problem, a vibration problem, and sometimes a positioning problem all wearing the same disguise.
Here’s the thing most articles skip: your hands aren’t broken. The nerves are fine. They’re just getting squeezed for hours at a time, and nerves hate that. The good news — almost every case traces back to one of three mechanical causes. Bar height. Lever angle. Vibration. Fix those and the numbness disappears. That’s what makes this problem so endearing to us cyclists: it looks complicated but it almost always isn’t.
So, without further ado, let’s dive in.
Check Your Bar Height and Reach First
Probably should have opened with this section, honestly. I spent an entire summer fighting numbness before discovering my stem was a half-inch too long. Half an inch. That small distance was pitching me slightly forward and dumping weight onto my palms that my core was supposed to be carrying.
When your bar sits too low or sits too far out, your arms stop being arms and start being kickstands. They brace constantly against the bar just to keep you from sliding forward. That tension — held for two, three, four hours — compresses the nerves running through your wrist and palm.
Here’s how to diagnose it yourself. Ride in your normal position and look at your elbows. Roughly 90 degrees is the target — maybe a bit less if you’re in the drops on a road bike. Elbows nearly straight or locked out? Your reach is too long. Check your shoulders too. They should sit relaxed, not hunched up toward your ears. Finally, notice whether you’re gripping the bar or just resting on it. Grippers almost always have a reach problem.
Two ways to fix it. Threaded headset on an older steel bike? Stack 10–15mm of spacers under the stem. Tighten it down. Bar goes up, weight shifts back, problem often solved — without spending a dollar. If you’ve maxed out your spacers or you’re running a tapered headset, a shorter stem is the answer. Dropping from a 120mm to a 100mm stem runs $40–80 and takes maybe ten minutes to swap out.
Even a centimeter of bar raise can eliminate numbness entirely. A friend of mine — completely numb hands on every century ride — went to zero issues after raising his bar one centimeter. One centimeter. Don’t make my mistake of waiting an entire season to try it.
Adjust Your Brake Lever Angle
Lever angle is almost always wrong. I’m apparently obsessive about this now and checking it first works for me while ignoring it never did. Most riders angle their levers downward to follow the natural slope of the bar — it looks right, it feels intuitive, and it leads directly to carpal tunnel compression.
Neutral wrist position means your hand hangs relaxed at your side, no bending up or down. The moment you angle levers downward, every reach for the hoods puts your wrist into extension. Hold that extended position across a four-hour ride and the nerve inside the carpal tunnel gets pinched repeatedly.
What you want: hands resting naturally on the hoods with wrists straight. Not cocked up. Not bent down. Straight. On drop bars, the flats of your palms should run roughly parallel to the ground when you’re settled into the drops.
Fixing it takes a 4mm Allen key — sometimes 5mm on older bikes. Loosen the lever clamp, rotate the lever upward until the tip points toward horizontal or just slightly above, tighten it back down. Ride around the block. Your wrist should feel neutral, effortless. If it still feels extended, rotate up another few degrees.
Two minutes. I avoided this fix for three years because it seemed too simple. It wasn’t too simple. It was exactly simple enough.
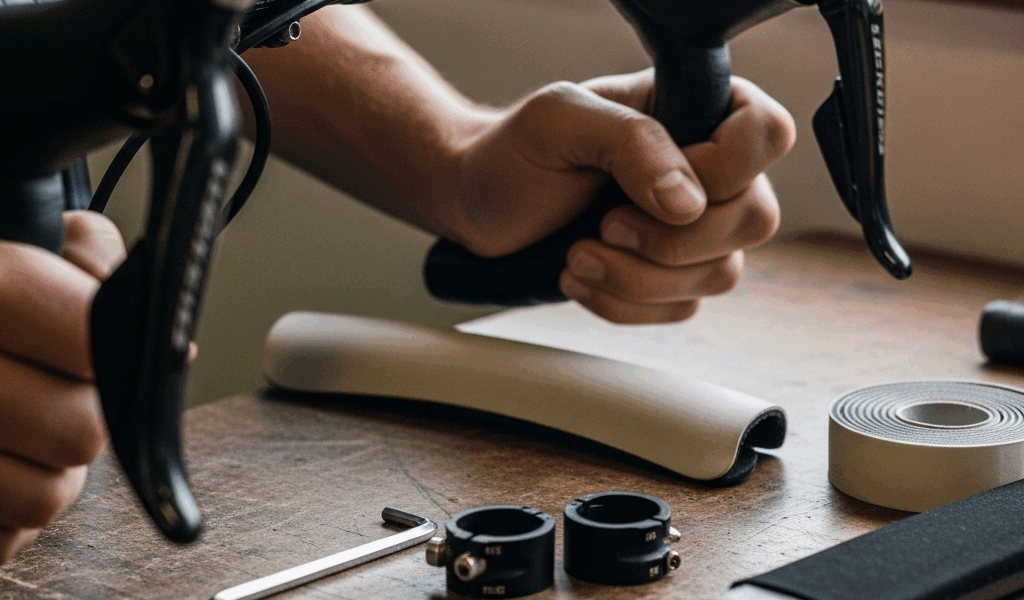
Gloves, Bar Tape, and Reducing Vibration
Road vibration hammers your palms mile after mile — every crack, every chip in the pavement sending a small shock wave straight up the bar and into your nerves. Enough repeated micro-impacts and the irritation builds the same way sustained pressure does. Different cause, same result.
Padded gloves are the first line of defense. Placement matters more than thickness — you want gel padding sitting over the ulnar pad, the fleshy area on the pinky side of your palm where the ulnar nerve runs. Look at the glove before buying it. Pearl Izumi and Giro both position thicker gel specifically over that spot. Cheap gloves spread padding evenly across the whole palm, which is essentially useless for nerve protection.
Bar tape gets overlooked constantly. Thin PVC tape over bare aluminum bar transmits vibration almost perfectly — there’s almost nothing between your skin and the metal. Double-wrapping gives you two layers of damping immediately, no new purchases required. Better option: switch to foam-backed cork tape or silicone tape. Lizard Skins DSP tape absorbs vibration noticeably better than standard cloth tape. It runs $18–25 per roll versus $8 for the basic stuff. On a rough road bike over rough pavement, that difference is real.
The principle is straightforward. More material between your palm and the bar means less vibration reaches the nerve. More layers, less hammering, less numbness.
When to Move Hands and When to See a Fitter
Change your hand position every 10–15 minutes on long rides — hoods to drops to the flat tops and back again. This shifts pressure around to different parts of your palm so no single spot takes two hours of sustained compression. Riders who lock into one position and stay there are almost guaranteed numb hands by mile 40, regardless of how good their setup is.
If you’ve raised the bar, corrected the lever angle, doubled the tape, upgraded the gloves, and you’re still losing feeling after two or three rides — see a professional bike fitter. At that point the issue is something self-diagnosis won’t find. Saddle height affecting your weight distribution. Excessive drop from saddle to bar. A stem that’s close but still not right. These things compound in ways that are genuinely hard to see from the saddle.
A professional fit runs $150–300 depending on where you go and how detailed they get. Worth every dollar if the DIY route isn’t working. You’ll come away riding better in every dimension — not just with hands that stay awake past mile 30.


Stay in the loop
Get the latest cycle tech trends updates delivered to your inbox.