Why Cold Weather Wrecks Your Shifting
Winter cycling has gotten complicated with all the conflicting advice flying around. As someone who spent three Novembers diagnosing the same sluggish shifting problem on my Trek Marlin, I learned everything there is to know about cold-weather drivetrain failures. Today, I will share it all with you.
Five years ago, November became my least favorite month on a bike. My shifting went from crisp to something resembling a button with a two-second delay — at least if that button was submerged in cold honey. The derailleur would hesitate. The chain would hang between gears. Halfway up a climb, I’d be stuck genuinely wondering whether the next shift would happen at all.
But what is actually happening to your bike in the cold? In essence, it’s a combination of physics and bad maintenance timing. But it’s much more than that. Cable housing contracts in freezing temperatures. Sounds minor. It isn’t. That housing is the rigid tube your shift cable runs through, and when it shrinks, cable tension drops — even if nothing is visibly broken. Meanwhile, whatever grease lives inside your rear derailleur’s pivot points thickens up considerably. Below 5°C, standard chain lube stops flowing. Wet lubes especially turn into grit-attracting sludge that freezes in place and grinds your shifts to a halt.
These problems are fixable. No bike shop required. Twenty minutes, maybe. So, without further ado, let’s dive in.
Check Your Cable Tension First
Probably should have opened with this section, honestly. This one fix handles the problem nine times out of ten and takes roughly two minutes flat.
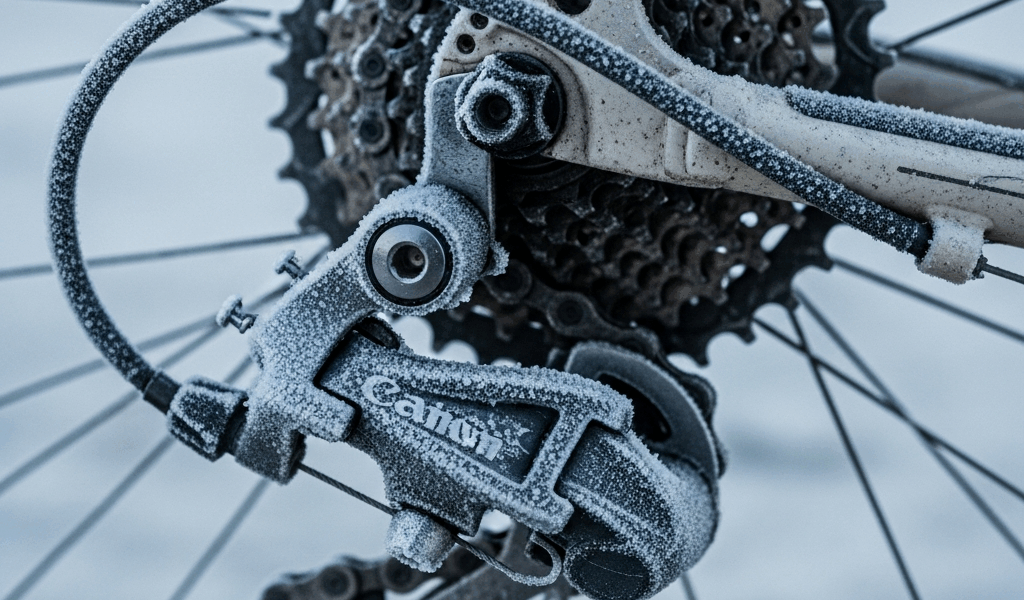
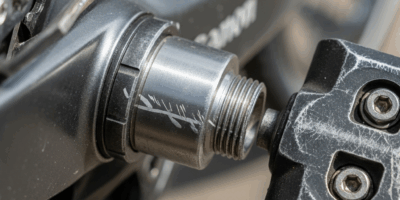
Find the barrel adjuster on your rear derailleur — the small cylindrical knob where the shift cable enters the derailleur body. Cold weather drops cable tension as the housing contracts, even on a perfectly tuned bike. Sluggish upshifts are the telltale sign. The chain fights to reach a smaller cog and sometimes doesn’t bother.
Turn the barrel adjuster counterclockwise one half-turn. Then test. Shift up and down through your entire cassette — slowly, deliberately. Still dragging? Another half-turn. Most riders feel the difference within one full turn of that adjuster.
Good tension means a tap on the lever sends the chain decisively to the next cog. Bad tension feels mushy. You get lag. The chain hovers between gears before eventually settling somewhere. If you’ve overtightened and the bike starts overshifting, back off with a clockwise turn.
One caveat worth knowing: bikes that have lived through years of salt spray or wet commutes sometimes have cables that are permanently stretched or corroded inside the housing. That’s a different problem entirely — and we’ll get there. But for 90% of you reading this, the barrel adjuster is the answer. Don’t make my mistake of immediately pulling the whole cable when a thirty-second adjustment was all that was needed.
Swap Out the Wrong Lube for Cold Conditions
Your chain lube is probably killing your shifts. I’m apparently sensitive to this issue, and Finish Line Dry works for me while wet lube never does once January hits.
Wet lubes — the thick, honey-colored stuff sold in every bike shop — shed water beautifully in mild weather. Fantastic for November in Portland. A genuine disaster for January in Minnesota. Below 5°C, that lube thickens, stops flowing through your chain links, and starts collecting grit. That grit freezes solid around your drivetrain. Acts like a brake on everything.
Chain wax is even worse in cold conditions. Paraffin-based waxes harden when temperatures drop, turning your chain into something closer to a rigid stick than a lubricated component.
What actually works: dry lubes or cold-specific lubes rated explicitly for winter riding. Dry lube is synthetic, stays liquid below freezing, and won’t gunk up your derailleur. Look for Finish Line Dry, Rock N Roll Gold, or Squirt Lube — most shop shelves carry at least one of them. Prices run $8 to $14 per bottle. The tradeoff is reapplication frequency. Dry lube doesn’t last as long as wet. Worth it completely.
Before switching lubes, degrease the chain. Spray citrus degreaser or Simple Green on a rag, wipe the chain down, let it dry fully. Old wet lube mixed with new dry lube creates its own brand of sludge. That’s what makes this step non-negotiable for anyone serious about winter performance.
Flush and Regrease the Derailleur Pivots
Stiff derailleur pivots are the overlooked culprit in cold-weather shifting lag. That’s what makes this fix endearing to us winter riders — it’s the one most people skip and then wonder why nothing else worked.
Your rear derailleur pivots on two bolts at the derailleur body. Those joints are packed with grease. Cold weather thickens that grease. A sluggish pivot means the derailleur can’t spring back quickly after a shift — and you get that familiar delay where the shifting technically happens, just not promptly.
Here’s the fix. Grab a rag or old shop towel. Spray degreaser around the two pivot points while working the derailleur arm back and forth by hand. Watch the old grease emerge — dark and crusty if you haven’t serviced it in a year or two. Wipe it away. Give it thirty seconds to dry.
Apply a small amount of lightweight grease rated for low temperatures. Shimano Dura-Ace grease is the standard, but any bearing grease marked for cold use works fine. A grain-of-rice amount per pivot is genuinely all you need. Work the derailleur arm back and forth ten times, then wipe away the excess.
Ten minutes total. I started doing this every October without fail, and my shifting stayed responsive through a particularly brutal January last year in Denver — temperatures dipping to -12°C on a few commutes.
When the Problem Is the Cable Housing Itself
Frustrated by slow shifting after trying everything above, many riders eventually discover the real culprit — failed cable housing — usually while staring at a derailleur that looks completely fine from the outside.
Cable housing doesn’t last forever. Rain gets in. Moisture sits inside the liner. Over three or four years, that inner plastic can crack or corrode. When housing integrity fails, friction increases and the cable can’t slide freely. Cold weather compounds this because everything contracts and tightens simultaneously. This new problem took off as a concern several years after indexed shifting became standard, and it eventually evolved into the housing-replacement procedure enthusiasts know and perform today.
Look for these signs specifically: housing that’s visibly cracked or split along its length, corrosion stains on the outer aluminum ferrules, or shifting that’s slow in both directions — not just upshifts. If your derailleur cable is older than three or four years and your bike lives in a garage without climate control, housing failure is a legitimate suspect.
While you won’t need a professional mechanic for this, you will need a handful of specific supplies. Pre-cut derailleur cable housing runs $3 to $8 at any bike shop. A new cable costs another $5. First, you should attempt the other three fixes — at least if you want to avoid an unnecessary repair. Housing replacement might be the best option, as this particular failure requires fresh cable and liner to fully resolve. That is because no amount of adjustment compensates for a cable that physically cannot slide through a damaged tube.
Installation takes fifteen minutes with prior experience, thirty without. And when it’s done correctly, your shifting will genuinely feel new again.
So here’s the actual roadmap. Start with the barrel adjuster — day one, two minutes. No change? Switch to cold-weather lube before your next ride. Still struggling a week later? Grease those pivots. Only after all three fail should housing replacement enter the conversation. Work through it in order. That’s what makes this approach work where random internet advice usually doesn’t.


Stay in the loop
Get the latest cycle tech trends updates delivered to your inbox.