Tubeless tires have become standard on gravel and mountain bikes, and they’re increasingly popular on road bikes too. The system offers puncture resistance, lower rolling resistance, and improved ride quality—but only when set up correctly. This guide covers everything you need for a successful tubeless installation and long-term maintenance.
Benefits of Going Tubeless
Puncture Resistance
Sealant inside the tire plugs small holes automatically, often without you noticing. Thorns, glass, and small debris that would flat a tubed tire are sealed almost instantly. Larger cuts may require adding more sealant or using a tubeless plug.
Lower Rolling Resistance
Without an inner tube creating friction against the tire casing, tubeless tires roll more efficiently. Independent testing shows savings of 2-4 watts per wheel at typical pressures.
Improved Ride Quality
You can run lower pressures without risking pinch flats (snake bites), which improves grip and comfort. Lower pressure also allows the tire to conform to surface irregularities, maintaining speed over rough terrain.
Weight Considerations
While you eliminate the tube (roughly 80-120 grams), you add sealant (60-90 grams) and potentially heavier tubeless-specific tires. The net weight difference is often minimal, though rotating mass savings at the rim are more significant than static weight.
What You Need for Tubeless Setup
Tubeless-Ready Wheels
Look for “TLR” (Tubeless Ready) or “UST” (Universal Standard Tubeless) designations. These rims have a specific bead seat profile and airtight rim bed that work with tubeless tires. Non-tubeless wheels can sometimes be converted but present more challenges.
Tubeless-Compatible Tires
Tires marked “TL,” “TLR,” or “Tubeless Ready” have reinforced beads and airtight casings. Standard clincher tires are not safe for tubeless use—the beads aren’t designed to hold without tube pressure.
Tubeless Rim Tape
If your rims don’t come pre-taped, you’ll need tubeless-specific tape to seal spoke holes. Stan’s, DT Swiss, and Gorilla Tape (in a pinch) all work. Tape must be slightly wider than the internal rim width.
Tubeless Valves
Specific valves with rubber grommets seal against the rim bed. Match valve length to rim depth—deeper rims need longer valves. Removable cores allow easy sealant addition.
Sealant
Liquid sealant coats the tire interior and plugs punctures. Different formulas suit different conditions—more on this below.
Floor Pump or Compressor
A high-volume floor pump works for most setups. Tight tire/rim combinations may require an air compressor, tubeless inflator canister, or pump with a booster tank.
Choosing the Right Sealant
Sealant formulas fall into two main categories:
Latex-Based Sealants
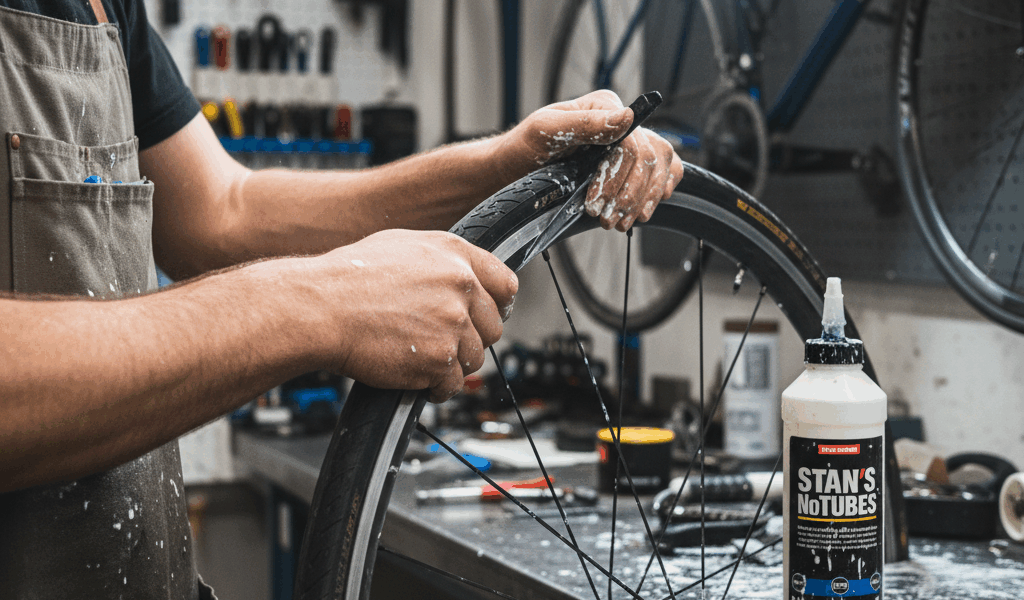
Stan’s NoTubes, Orange Seal, and Muc-Off are latex-based. They seal quickly and handle small to medium punctures well. They tend to dry out faster in hot conditions and require more frequent refreshing (every 2-4 months).
Synthetic/Fiber-Based Sealants
Finish Line, Ride Air, and some newer formulas use synthetic particles. They may take slightly longer to seal but last longer inside the tire. Some handle larger punctures better due to fiber content.
How Much Sealant to Use
- Road tires (23-32mm): 30-60ml per tire
- Gravel tires (35-45mm): 60-90ml per tire
- Mountain bike tires (2.0-2.6″): 90-120ml per tire
- Fat bike tires: 120-180ml per tire
Step-by-Step Tubeless Installation
1. Prepare the Rim
Clean the rim bed with isopropyl alcohol. Apply tubeless tape starting opposite the valve hole, overlapping itself by a few inches on completion. Press firmly to eliminate air bubbles, especially around spoke holes. Poke a small hole for the valve stem.
2. Install the Valve
Insert the valve through the rim from inside, threading the lock ring finger-tight from outside. Don’t over-tighten—this can damage the rubber grommet.
3. Mount the Tire
Install one bead completely, then the second bead. This is often the hardest part. Tire levers can damage tubeless beads—use them sparingly and carefully. Soapy water on the bead helps difficult combinations.
4. Add Sealant
Two methods work:
- Before seating: Pour sealant into the mounted-but-unseated tire, then inflate quickly
- After seating: Seat the tire first, remove the valve core, inject sealant through the valve, replace the core
5. Seat the Beads
Inflate quickly to seat the bead—you should hear audible “pops” as the bead snaps into the rim hook. If your pump can’t generate enough flow, try a tubeless booster tank, CO2 cartridge, or compressor. Maximum pressure varies by tire; don’t exceed the sidewall rating.
6. Distribute the Sealant
Shake the wheel to spread sealant around the entire tire interior. Rotate the wheel slowly, letting sealant coat all surfaces. Spin the wheel and check for any air leaking at the bead or through the tire.
Setting the Right Pressure
Tubeless allows lower pressures than tubed setups. Starting points by tire width:
- 25-28mm road: 60-80 PSI
- 32-38mm gravel: 35-50 PSI
- 40-50mm gravel: 25-40 PSI
- 2.0-2.4″ MTB: 22-30 PSI
- 2.5″+ MTB: 18-25 PSI
Actual ideal pressure depends on rider weight, terrain, and rim width. Experiment to find the balance between grip, comfort, and avoiding tire roll on corners.
Troubleshooting Common Issues
Tire Won’t Seat
Apply soapy water to the bead. Remove the valve core for maximum airflow. Try a tubeless booster or CO2 cartridge. Check that tape hasn’t bunched up at the bead seat.
Slow Leak at Valve
Re-tighten the lock ring. Replace the valve’s rubber grommet. Ensure tape completely covers the valve hole without gaps.
Sealant Spraying from Sidewall
Light weeping is normal during initial setup. Persistent spraying suggests a tire or rim incompatibility, or a damaged tire casing. Rotate the wheel slowly to let sealant accumulate at the leak point.
Bead Burping on Corners
Pressure is too low for your tire/rim combination and riding style. Increase pressure or consider a tire with stiffer sidewalls.
Ongoing Maintenance
Checking Sealant Levels
Shake the wheel—you should hear liquid sloshing. If silent, add fresh sealant. Check every 2-3 months in moderate climates, more often in hot, dry conditions.
Removing Dried Sealant
When mounting new tires or adding sealant, peel out dried latex accumulation. Excessive buildup adds weight and can clog valves. A tire boot can remove stubborn residue.
Valve Core Maintenance
Sealant can clog valve cores. Remove and clean cores periodically, or keep spare cores on hand. Inject sealant with the valve at the top to minimize core exposure.
Trail and Road Repair
When sealant alone can’t handle a puncture:
- Tubeless plugs: Bacon strip plugs inserted with a plug tool seal cuts up to about 6mm
- Tire boots: For sidewall cuts, apply a boot from inside before re-inflating
- Emergency tube: Always carry a tube for catastrophic failures—remove sealant residue from the rim as best you can before inserting
Tubeless setup requires more initial effort than standard tubes, but the benefits in puncture resistance and ride quality make it worthwhile for most riders. With proper installation and maintenance, you’ll enjoy miles of worry-free riding.


Stay in the loop
Get the latest wildlife research and conservation news delivered to your inbox.