Bike gears have gotten complicated with all the speed counts and drivetrain marketing flying around. As someone who spent a decade commuting and racing on everything from 3-speed hubs to 12-speed electronic shifting, I learned everything there is to know about how these systems actually work. Today, I will share it all with you.
That’s what makes understanding gearing endearing to us mechanical enthusiasts — it’s simple physics dressed up in expensive components.
What Gears Actually Do
But what is a gear ratio? In essence, it’s the relationship between how fast your pedals spin and how fast your wheel turns. But it’s much more than that.
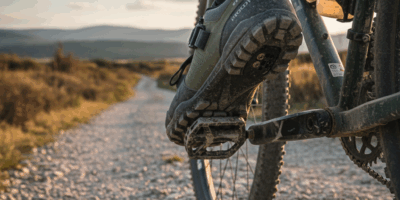
When you pedal, you’re spinning a chainring (the big toothed ring attached to your pedals). The chain transfers that rotation to a cog on your rear wheel. The size difference between these two determines your gear ratio.
Big chainring + small rear cog = hard gear. Each pedal stroke turns the wheel many times. Great for going fast on flat ground. Brutal on hills.
Small chainring + big rear cog = easy gear. Each pedal stroke turns the wheel fewer times. Climbing becomes manageable. Speed on flats drops.
That’s genuinely the whole concept. Everything else is just different ways of changing which chainring and cog the chain sits on.
The Components Involved
Probably should have led with this section, honestly — knowing the parts helps everything else make sense.
- Chainrings: The front gears attached to your crankset. You might have one (1x), two (2x), or three (3x). Modern trends favor fewer chainrings.
- Cassette: The cluster of cogs on your rear wheel. Ranges from 7 to 13 speeds depending on your drivetrain.
- Chain: Connects everything. Wears out. Replace it before it destroys your more expensive components.
- Derailleurs: The mechanisms that physically push the chain between gears. Front derailleur moves chain between chainrings. Rear derailleur moves chain across the cassette.
- Shifters: The controls on your handlebars. Pull a lever, the derailleur moves, the chain shifts gears.
Derailleur Gears: The Common System
Most bikes use derailleur gearing. The chain runs externally across multiple gears, and the derailleurs push it where you want it to go.
The advantages are real: wide gear range, efficient power transfer, relatively lightweight. I’ve run derailleur systems for over 100,000 miles combined. When properly maintained, they work beautifully.
The disadvantages are also real: exposed components mean more maintenance, regular adjustments, and vulnerability to crashes and debris. I’ve also bent multiple derailleur hangers and snapped a chain mid-race. Systems fail.
Hub Gears: The Alternative
Internal hub gears hide everything inside the rear wheel hub. Shimano Nexus and Alfine hubs are the common examples. The chain never moves — all shifting happens internally.
I’m apparently in the minority who genuinely appreciates hub gears for commuting. My Alfine 8-speed ran three winters in Minneapolis with minimal attention. That same treatment would have destroyed an exposed derailleur system.
The trade-offs: heavier, fewer gear options, less efficient power transfer, harder to service when they do fail. For racing or performance riding, derailleur systems win. For daily transportation in harsh conditions, hub gears earn consideration.
How to Actually Shift
Frustrated by grinding noises when I first started cycling, I eventually learned these fundamentals:
Shift before you need to. Approaching a hill? Shift to an easier gear while you’re still pedaling smoothly. Shifting under heavy load stresses everything and often doesn’t work.
Ease pedal pressure during the shift. You don’t stop pedaling — you briefly reduce how hard you’re pushing. The chain moves more smoothly with less tension.
Avoid cross-chaining. Using the big chainring with the biggest rear cog (or small chainring with smallest cog) puts the chain at an extreme angle. It works, but accelerates wear and sometimes causes rubbing. Modern drivetrains handle this better than older ones, but the principle remains.
One shift at a time. Especially with front shifts, let the chain settle before shifting again. Racing through multiple gears quickly leads to dropped chains and mechanical noises.
Gear Numbers: What They Mean
A “10-speed” bike has 10 cogs on the cassette. A “2×10” setup means two chainrings up front and 10 cogs in back, giving 20 theoretical gear combinations (though some overlap).
Modern mountain bikes often run 1×12 — one chainring, 12-cog cassette. Road bikes frequently use 2×11 or 2×12. The marketing suggests more speeds equals better. Reality is more nuanced.
What matters: Do you have gears easy enough to climb your hills, and gears hard enough to go the speed you want? If yes, your gear count is sufficient. I’ve ridden centuries on 7-speed systems and races on 22-speed setups. Both worked fine for their purposes.
Electronic vs Mechanical Shifting
Electronic shifting uses motors instead of cables to move derailleurs. Shimano Di2, SRAM eTap, and Campagnolo EPS are the major systems. Press a button, the derailleur moves precisely.
The shifts are faster and more consistent. The adjustment stays perfect indefinitely (cables stretch and require regular tweaking). The feel is undeniably better.
The cost is substantial. Entry-level electronic groupsets start around $1,500 and go much higher. Batteries need charging. When something breaks, repair costs more and requires specific tools or dealer service.
I ran Di2 for two years. The performance was excellent. I went back to mechanical when I crashed and faced a $400 repair bill. Both systems work. Choose based on budget and tolerance for maintenance.
Maintenance Reality
Gears require attention:
- Keep the chain clean and lubricated. Dirty chains destroy cassettes and chainrings. Replacement interval for chains: every 2,000-3,000 miles. Cassettes last 2-3 chain lifetimes. Chainrings last longer still.
- Cable tension changes over time. New cables stretch. If shifting becomes imprecise, turn the barrel adjuster to add or remove tension.
- Check derailleur alignment after crashes. Even minor impacts can bend the derailleur hanger, causing shifting problems across the entire cassette.
Making the Call
Gears are tools. More isn’t automatically better. Electronic isn’t automatically better. What matters is having the right range for your terrain and a system you’ll actually maintain.
Start with understanding the basics. Everything else — gear counts, electronic options, exotic materials — builds on the same fundamental principle: chainrings and cogs create ratios that make pedaling easier or harder. Master that concept and the marketing noise becomes much easier to filter.
Recommended Cycling Gear
Garmin Edge 1040 GPS Bike Computer – $549.00
Premium GPS with advanced navigation.
Park Tool Bicycle Repair Stand – $259.95
Professional-grade home mechanic stand.
As an Amazon Associate, we earn from qualifying purchases.