Why Bottom Bracket Creaks Are Hard to Diagnose
Bottom bracket creaking has gotten complicated with all the conflicting advice flying around. Every forum thread sends you somewhere different — new BB, new cranks, new frame. I’ve been that rider at midnight, convinced my carbon was delaminating, typing increasingly desperate search queries into my phone. Turns out it was a cleat bolt. That was 2019. I’ve since learned everything there is to know about chasing bicycle creaks. Today, I will share it all with you.
Here’s the thing nobody tells you upfront: sound travels through aluminum and carbon like gossip through a small town. A creak born at your seatpost clamp will echo down the tubes and surface audibly right at the crank — which your brain immediately blames. Your pedal platform might be flexing. Your cleats might be backed out half a turn. A saddle rail could be slipping under load. All of it sounds like a bottom bracket death rattle when you’re grinding up a climb.
Most riders who self-diagnose a creaking bottom bracket don’t actually have a bottom bracket problem. Seatpost. Cleats. Pedal hardware. We’re doing elimination first, wrenching second. This saves hours — at least if you actually follow the order instead of skipping straight to the BB tool like I always used to do. Don’t make my mistake.
Rule Out These Culprits First
Let’s isolate the real source before we touch a single crank bolt. So, without further ado, let’s dive in.
Pedals and Cleat Bolts
Pedal platform flex and loose cleat bolts generate creaks that sound identical to BB noise. The test is simple: stand on the pedals and ride. If the creak disappears — or shifts noticeably — your saddle is innocent. Move on.
Next, check every cleat bolt. M6 bolts on most road cleats should torque to 4–6 newton-meters. Tight, but not gorilla-tight. Use a quality hex key and feel for real resistance. I once spent two weeks chasing what I genuinely believed was frame damage before noticing my SPD-SL cleat bolts had backed out by half a turn. Embarrassing. Completely fixable in 90 seconds with a 4mm hex.
For platform pedals, grab the pedal body and wiggle it side to side by hand. Any movement means worn axle threads or a wallowed-out crank arm hole — both creak sources. Clipped pedals should have zero play. Zero.
Saddle Rails and Seatpost
Stand and pedal for 30 seconds. Sit and pedal for 30 seconds. Does the creak change? Saddle rail creaks vanish when you stand because your weight isn’t pressing the rails into the clamp anymore. That distinction matters.
Loosen your seatpost clamp one full turn. Slide the post up and down a few millimeters to break any micro-adhesion that’s built up. Apply a thin layer of assembly paste — I use Park Tool PolyLube 1000, about $12 a tube, and I’m apparently the kind of person who buys it in bulk — then retighten to spec. This cures roughly 60% of seatpost creaks. It’s almost offensive how often it works.
For saddle rail creaks specifically, pull the saddle off entirely. Inspect the rails for cracks or any permanent bending. Check that clamp bolts are snug — typically 5–7 newton-meters for most seatpost designs. Wipe the rails clean, reposition, reinstall, test.
Front Quick Release
Forgotten by almost everyone, including me until a mechanic pointed it out. A loose front hub quick release or loose thru-axle transmits creaks through the fork and drops them squarely in your lap — or rather, your bottom bracket area. Spin the front wheel by hand. Zero side-to-side play is what you want. Tighten the QR or axle if you feel any movement at all.
How to Confirm the Creak Is Actually the Bottom Bracket
You’ve ruled out the obvious suspects. Now we verify.
Find a quiet parking lot or empty stretch of road. Pedal at different cadences — slow and grinding hard, fast and light, somewhere in the middle. Vary by roughly 20 RPM increments. Just listen.
A true bottom bracket creak has specific behavior. It shows up under load, particularly when you’re driving force into the pedals. It hits on both the downstroke and upstroke — not just one leg. It often shifts pitch with cadence changes. A worn bearing or loose component inside the BB shell creates friction under compression that varies with pedal position. That rhythmic, metallic, hollow sound originating from the center of the bike — below the seat tube junction — that’s your BB talking.
Saddle creaks are load-dependent but only vertically. Sit and pedal hard: creak. Stand and pedal hard: silence. Pedal creaks are load and angle-dependent, usually loudest under lateral force — cornering, sprinting out of the saddle while rocking the bike. Seatpost creaks tend to appear only under specific body positions or when rocking side to side. Bottom bracket creaks are rhythmic, metallic, and relentless.
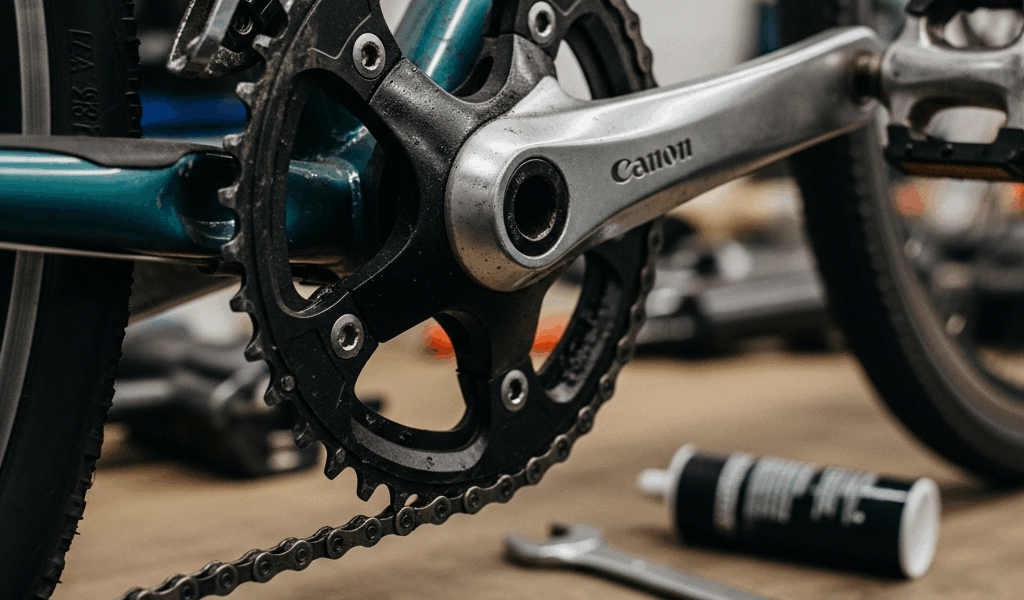
But what is a press-fit bottom bracket? In essence, it’s a bearing system pressed into a smooth shell with no threads — held in place by friction and bearing preload alone. But it’s much more than that — it’s the reason half these forum threads exist at all. Threaded BBs are older, more reliable. The cups screw into actual frame shell threads. Loose or corroded threads creak intermittently and respond well to cleaning and regreasing. Press-fit BBs creak earlier, louder, and more often. That’s what makes threaded BBs endearing to us wrench-it-yourself riders. If you have a press-fit shell, prepare yourself for repeat visits to this problem.
Step-by-Step Fix for Threaded and Press-Fit BBs
Threaded Bottom Brackets — The DIY Path
Most bikes made before 2010 use threaded BBs. Genuinely fixable at home. While you won’t need a fully equipped shop, you will need a handful of specific tools.
- Remove the crank arms. You’ll need a crank puller ($15–40) and a 15mm hex key or socket. Loosen the non-drive side bolt first, then the drive side. Thread in the puller and turn until the arm slides free. Repeat opposite side.
- Remove the BB cups using a cup tool matched to your BB model. Park Tool BBT-22 ($30) covers most Shimano and SRAM threaded BBs. Drive side turns counterclockwise to remove. Non-drive side turns clockwise — yes, it’s reverse-threaded, and yes, that surprises everyone the first time.
- Dump out the bearings. Loose ball bearings on older Shimano units, cartridge bearings on newer models. Inspect for pitting, rust, or discoloration. Visible damage means replacement — $25–80 depending on BB model.
- Clean the frame shell threads with a rag and white vinegar or a soft brass brush. Remove every trace of old grease and corrosion. Let dry completely before moving on.
- Apply anti-seize compound or heavy marine grease to the shell threads — thin layer only. This prevents corrosion and allows future removal without seizing. I use Shimano grease, but any waterproof bike-specific grease works here.
- Reinstall the fixed cup first. Torque to 50–70 newton-meters, starting at the low end.
- Install bearings and the adjustable cup. Hand-tighten until snug, then back off a quarter turn. Too tight and the bearings bind. Too loose and they clatter. This adjustment is the one step most people rush.
- Check for play by grabbing the crankset and wiggling side to side. You want zero play. Any movement: tighten the adjustable cup another eighth turn and recheck.
- Reinstall crank arms. Torque crank bolts to 30–40 newton-meters on Shimano, 32–50 on SRAM. Use an actual torque wrench. Under-tightened cranks creak independently of the BB — a fact that has humbled many experienced riders.
Test ride immediately. The creak should be gone.
Press-Fit Bottom Brackets — Know Your Limits
Honest take: DIY press-fit work is possible but punishing. Press-fit cups must be removed and installed with perfectly parallel force — get it wrong and you damage the shell permanently. A frame-facing tool runs $200–500. A BB press runs another $80–200. Unless you’re working on multiple bikes every month, the math doesn’t work.
Three options exist. First, take the bike to a shop with a dedicated press tool — expect $50–120 in labor, which is genuinely worth it. Second, some cartridge press-fit BBs can be removed without a frame-facing tool if the fit hasn’t seized — there’s real risk here, so understand what you’re doing before attempting it. Third, replace the BB with a quality cartridge unit ($40–150) and pay for professional installation.
If you insist on doing it yourself, at least rent the frame-facing tool from your local shop. Use it exactly as specified. One pass. No pressing twice. This is not a mistake-friendly process — at all.
When the Creak Comes Back After You Fix It
Probably should have opened with this section, honestly. Creaks returning within a few weeks are almost always contamination problems, not assembly problems.
Fixed a threaded BB and it came back? The shell threads are corroded deeper than you cleaned. Get a brass wire brush and get aggressive — vinegar alone won’t cut it at this point. You need real abrasion. Then reapply anti-seize and reinstall fresh.
Bearing contamination produces a slightly different sound — more of a grinding-plus-creak hybrid. Replace the bearings entirely. Cleaning and reusing contaminated bearings fails roughly 80% of the time. I’ve tried it more than once. It never ends well.
Press-fit BBs that creak after a professional install usually indicate shell damage during removal or installation. At that point, you’re replacing the BB again and hoping the press-fit surface is still serviceable. This is the fundamental downside of press-fit design — it’s less forgiving of every mistake in the chain, including ones made before you even owned the bike.
One final step: put threadlocker on your crank bolts before reinstalling. Loctite 243 — blue, medium-strength, about $8 at any hardware store. Tight cranks eliminate an enormous category of “BB creaks” that were never BB creaks to begin with.
Quick Action Checklist
- Pedal out of saddle for 30 seconds — does creak change?
- Check cleat bolts with hex key — any play at all?
- Check front hub QR or thru-axle — zero side-to-side movement?
- Test-ride at varied cadences — is the creak rhythmic with pedal stroke?
- Identify BB type — threaded or press-fit?
- Clean and reassemble if threaded; take to a shop if press-fit.
- Use Loctite 243 on crank bolts during reinstall.
Follow this path and you’ll find the real source. Fast.


Stay in the loop
Get the latest cycle tech trends updates delivered to your inbox.