Why Your Tire Keeps Going Flat Even After You Fix It
Dealing with repeat flat tires has gotten complicated with all the bad advice flying around. Patch it and move on, people say. Buy better tubes. Get thicker tires. Meanwhile, you’re stranded on the side of the road for the fourth time this month wondering what you’re actually doing wrong.
As someone who commuted on a fixed-gear bike for six years through Boston’s glass-filled streets, I learned everything there is to know about repeat flats the hard way. Today, I will share it all with you. The short version: I kept patching my tube, telling myself the problem was solved, and then finding myself flat again three days later. Turned out I had a tiny piece of glass still embedded in my tire casing the whole time. Never bothered to look for it. Don’t make my mistake.
Here’s what separates cyclists who get one flat from those who get ten — a systematic approach to diagnosis. You need to understand why the hole appeared before you patch anything. That’s what this article walks you through.
The Most Common Culprits Most Riders Miss
Embedded Thorn or Wire Still in the Tire
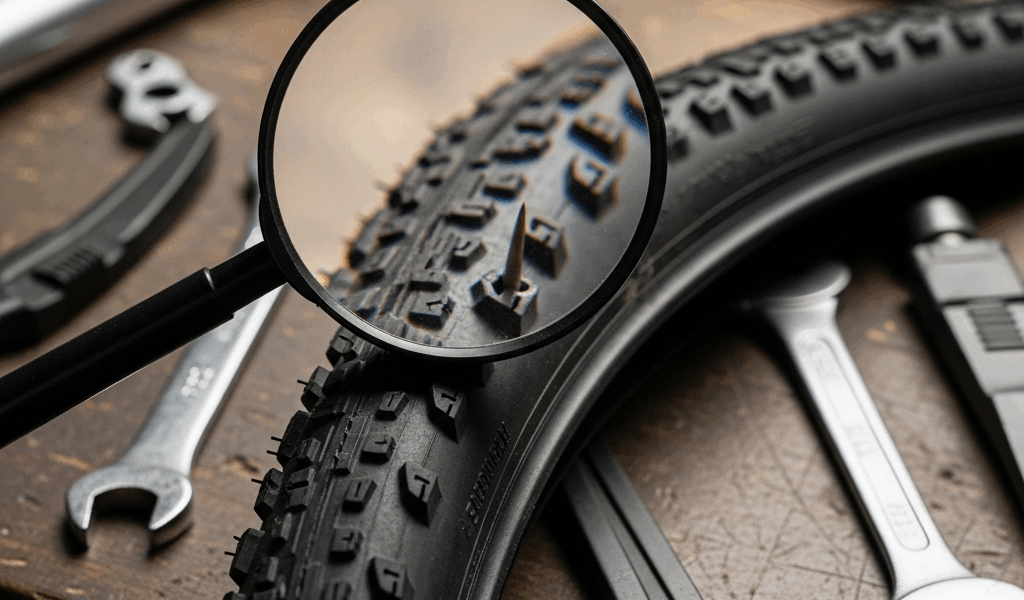
This is the number-one reason a bike tire keeps going flat after you’ve already fixed it. You patch the tube, reinflate, and within days — sometimes hours — you’re flat again in nearly the same spot. The culprit is still sitting inside your tire casing. Waiting.
Remove the tire completely from the rim. Run your fingers slowly along the inside surface, feeling for anything sharp. Do this carefully — a glass shard will absolutely cut you. If you find something, mark that spot with a pen on the outside of the tire before you do anything else. Frustrated by yet another mysterious flat on my morning commute, I once dug a quarter-inch wire fragment out from between my tire’s rubber layers using nothing but a thumbnail and a pen cap. I’d walked right past that thing three times before actually stopping to look. This new habit of checking the casing took off several weeks later and eventually evolved into the pre-ride inspection routine I rely on today.
Superficial punctures in the tire itself sometimes don’t require immediate replacement. Deep cuts, or multiple punctures clustered together — that tire needs to go.
Damaged or Pinched Rim Tape Exposing Spoke Holes
But what is rim tape? In essence, it’s a thin plastic or cloth barrier that keeps your tube from touching the sharp spoke holes along the inside of your rim. But it’s much more than that — it’s basically the only thing standing between your tube and a dozen tiny puncture points every single ride.
That’s what makes rim tape so easy to overlook. It’s invisible when everything’s assembled. Remove the tire and look at the tape around the entire rim. Check for tears, gaps, or sections peeling away. The tape should cover every spoke hole completely — no exceptions, no gaps.
If the tape is damaged, pull it off entirely and replace it. Rim tape runs $3 to $8 per roll at most bike shops. Takes about ten minutes to install. Probably should have opened with this section, honestly, because it’s one of the most commonly overlooked causes of recurring flats and one of the cheapest fixes on this list.
Pinch Flats from Under-Inflated Tires
A pinch flat happens when tire pressure drops too low and the tube gets compressed between the tire and the rim. Hit a pothole or roll over a sharp edge and the sudden squeeze creates two small holes on opposite sides of the tube — the classic snake-bite pattern. You’ll recognize it immediately once you’ve seen it.
Check your tire pressure before every ride. The recommended PSI range is printed right on the sidewall. Road bike tires typically need 80–130 PSI. Mountain bike tires need 30–50 PSI depending on the model and terrain. I’m apparently a chronic under-inflater, and my Lezyne floor pump works for me while my old Topeak thumb gauge never gave me accurate readings. A proper floor pump with a built-in gauge fixes this entirely.
Keep getting pinch flats even at correct pressure? Your tire pressure is dropping too quickly between rides — which usually means a slow leak somewhere else. A puncture so small it takes days to flatten the tire completely. That’s where the next section comes in.
Valve Stem Damage
The valve stem is where your pump connects to the tube. Cracked, bent, compromised seal — air escapes. Simple as that.
Inflate the tire and hold your ear close to the valve. No hissing should be audible whatsoever. If air is escaping there, the valve stem is damaged. Patching won’t help. The tube needs replacing, full stop.
How to Find a Slow Leak That Is Hard to Spot
You’ve ruled out the obvious culprits. Tire looks clean, rim tape is fine, pressure is correct. But your bike tire keeps going flat slowly — sometimes overnight, sometimes over three or four days.
Use the water bucket method. Fill a bucket or sink with water. Remove the tire and tube, inflate the tube to roughly half pressure, and submerge it completely. Watch for bubbles rising from the surface. Rotate the tube slowly through the water, checking every inch — including the valve stem area. Mark any punctures you find with a pen before deflating.
Once you’ve marked the hole, partially reinflate the tube and position that marked spot against the inside of the tire. Mark the corresponding location on the outside of the tire. Remove the tube again and inspect the tire at exactly that spot. This connects the hole in your tube directly back to whatever caused it — usually a thorn, a glass fragment, or a wire you missed the first time around.
Honestly, the water method should have been my first move six years ago instead of my last resort after dozens of flats. So, without further ado, let’s make it your first move instead.
Patching vs Replacing the Tube — When Each Makes Sense
A patch works fine for a single small puncture in otherwise good rubber. Most patch kits — the Park Tool GP-2 is a solid $4 option — include everything needed. Reliable, fast, effective.
Replace the tube instead if:
- The valve stem is damaged
- You find multiple punctures close together
- The tube is old and the rubber has deteriorated
- You’ve patched the same spot twice
Replacement tubes run $8 to $15 depending on size and valve type. Keep two spares in your house at all times. Cheap insurance — and it eliminates the decision-making when you’re already frustrated, standing in your kitchen at 7 a.m., trying to make it to work on time.
How to Stop It Happening Again
Check tire pressure before every ride. While you won’t need a full professional setup, you will need a handful of basic tools — specifically a floor pump with a built-in gauge. The $25 Lezyne Alloy Floor Drive is worth every dollar. Pressure drops over time even without punctures, and a properly inflated tire resists both pinch flats and rim impacts.
After riding in gritty conditions — gravel roads, construction zones, urban streets after a storm — stop and run your finger carefully inside the tire casing. Two minutes. That single habit prevents the embedded-object problem almost entirely.
Puncture-resistant tires might be the best option for commuters, as frequent urban riding requires serious protection against glass and debris. That is because standard tires simply aren’t built with enough reinforcement for daily street use. Schwalbe Marathon tires run $30 to $50 per tire and include extra rubber layers that shrug off most road debris. Continental Gatorskin tires are another solid option — particularly for road bikes dealing with urban conditions.
None of this requires expensive equipment. It requires attention and a systematic approach. The next time your bike tire goes flat, you’ll know exactly where to look.


Stay in the loop
Get the latest cycle tech trends updates delivered to your inbox.