Why Pinpointing the Source Changes Everything
Bottom bracket creaking has gotten complicated with all the bad advice flying around. Most guides tell you to yank the BB immediately — as if that’s always the answer. It rarely is. I’ve spent more hours chasing mystery creaks than I care to admit, and here’s the thing nobody says upfront: most creaks blamed on the bottom bracket aren’t coming from the bottom bracket at all.
The pedal threads. The crank arm bolts. The saddle rails. The seatpost clamp. Every single one of these can produce a creak that sounds like it’s living at the heart of your drivetrain. Sounds travel through aluminum and carbon in weird ways. What feels like it’s coming from your BB shell might be your saddle rail clamp the whole time.
I once swapped out a perfectly good Shimano Hollowtech II unit — spent maybe $40 and a frustrating afternoon — because I skipped straight to tearing things apart. Dry pedal threads were the culprit. Twenty minutes with some grease and the creak was gone. Probably should have opened with this section, honestly.
The good news: you don’t need a full teardown. You need a method. Set aside 20 minutes, grab your bike, and work through the candidates systematically. I’ve walked frustrated riders through this exact process at the local shop. It catches the real source about 80% of the time before anyone even touches the BB. So, without further ado, let’s dive in.
Step 1 — Rule Out Pedals and Cranks First
Start here. Pedal and crank issues are the most common noise generators — at least if my years of chasing this stuff count for anything — and they’re also the easiest to fix. Don’t skip to the complicated stuff before you’ve checked the obvious.
Pedal threads
Your pedal axles thread into your crank arms. Dry threads under load will creak every single pedal stroke. Pull the pedals off using a 15mm pedal wrench and look at the threads on both the axle and the crank arm hole. Dry, crusty, or gritty? You’ve probably found your problem right there.
Wipe both surfaces clean with an old rag. Apply a thin coat of grease — Shimano Dura-Ace grease works, Park Tool Polylube works, honestly even basic bearing grease from a hardware store works — to the threads. Thread the pedals back in by hand first. Then snug them with the wrench. Don’t crank them down hard on carbon cranks or you’ll cross-thread something expensive.
Go ride for five minutes. Creak gone? You’re done. Still there? Move to the crank arm bolts.
Crank arm bolts
Loose crank arms produce a creak that lives exactly where you’d expect a BB creak to live. It’s maddening. Grab an Allen key and check both sides. Snug isn’t enough here — torque specs actually matter.
- Square taper cranks: 35–50 Nm (usually marked on the crank itself)
- Hollowtech II (Shimano): 12 Nm for the pinch bolt, 50 Nm for the crank bolt on the non-drive side
- Direct mount (SRAM): 15 Nm for both bolts
No torque wrench? Most home mechanics don’t have one. Snug the bolts until they feel solid, then add about a quarter turn. Ride again. If the creak’s gone, great. If it’s still there, the bottom bracket itself is probably the actual source — and now you’ve earned the right to dig into it.
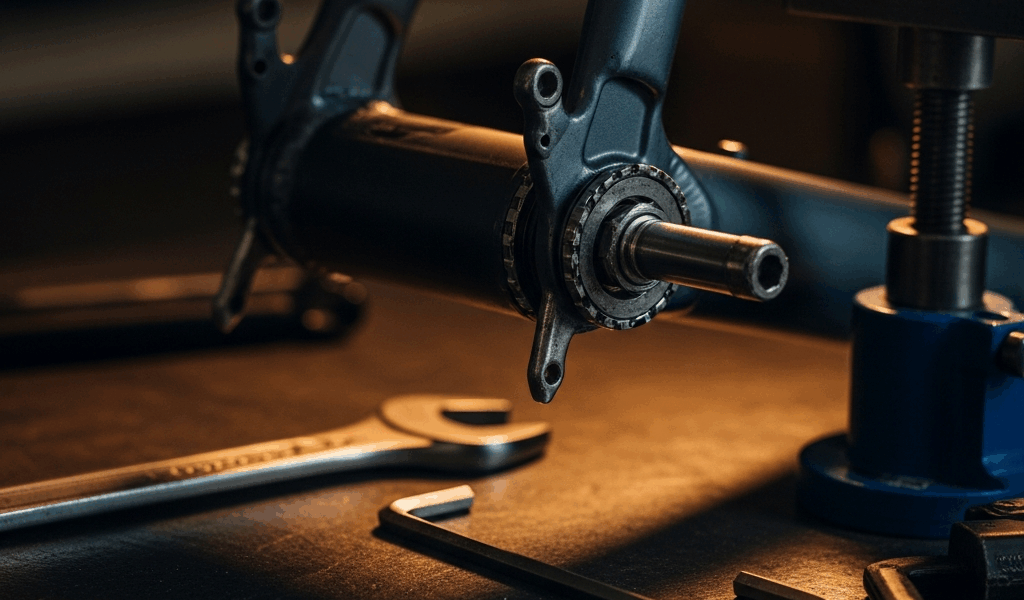
Step 2 — Inspect and Service the Bottom Bracket
Now you’ve ruled out the easy culprits. Time to look at the BB itself. But what is a bottom bracket, really? In essence, it’s the bearing assembly that lets your crankset spin inside the frame. But it’s much more than that — it’s also one of the most stress-loaded interfaces on the whole bike, which is exactly why it creaks when something goes wrong with the fit or the lubrication.
Threaded BSA and press-fit systems fail differently and need different approaches. Don’t treat them the same.
Threaded bottom brackets (BSA)
Threaded BB shells are common on steel and aluminum frames — pretty much every brand still uses them, and a lot of higher-end bikes have quietly gone back to threaded after years of press-fit headaches. The fix here is straightforward.
Pull the crank arm completely. That means removing the pedals first, then the crank bolts, then unscrewing the BB cups with a BB tool matched to your specific unit. I use a Park Tool BBT-19 for most Shimano and SRAM setups. It fits. Don’t improvise here or you’ll round off the cups.
Once everything’s out, clean the threads on the cups and inside the shell. Old grease, grit, and corrosion all prevent a solid interface. A wire brush or an old toothbrush with some degreaser handles it. Dry everything thoroughly — and actually dry it, not just “looks dry enough.”
Apply fresh grease to the cup threads and the shell threads. Some mechanics prefer Loctite 243 on the facing surfaces — the flat surfaces where the cup seats against the shell — instead of grease, arguing it stops micro-movement. I’m apparently a belt-and-suspenders type, and doing both works for me while grease-only never fully solved my creaks. Light grease on the threads, Loctite 243 on the facing surfaces. Reinstall to spec. Most Shimano units want 50 Nm on the drive side, 40 Nm on the non-drive side. Reinstall cranks and pedals, ride, test.
Press-fit bottom brackets
Press-fit systems are pressed into the frame by interference fit. They fail differently — usually worn bearing cups or movement inside the shell itself. A creak here tends to be more intermittent and harder to reproduce off the bike.
Before doing anything drastic, check if the cups are moving. Grab the crankset and try to rock it side to side. Any play means the cups have worn. Try rocking the BB shell from the outside too. If it moves, the shell is damaged or was never properly faced from the factory.
A poorly faced shell is beyond home repair. You’d need a bottom bracket facing tool — around $200 for a decent one — or a shop visit. Worn cups are more manageable. Remove the cartridge, clean the interface thoroughly, reinstall with fresh grease. Some riders swear by carbon-assembly paste instead of grease on press-fit shells for extra grip. Worth trying before you spend money.
Don’t make my mistake of assuming a press-fit creak will just sort itself out. It won’t. If cleaning and regreasing don’t fix it after two tries, take it to a shop.
Step 3 — Check Saddle and Seatpost if Creak Persists
This is the step that catches people. Saddle rail clamps and seatpost collars are legendary noise generators — the creak echoes through the frame and feels for all the world like it’s coming from the drivetrain. It’s not.
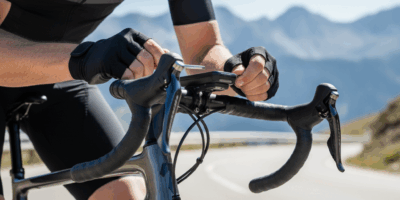
Here’s the test: stand up out of the saddle and pedal hard. Creak disappears when you’re not sitting? Your saddle or seatpost is the source. Sit back down and it returns. That right there is your answer — and you haven’t touched your BB at all.
To fix it, remove the seatpost — loosen the clamp bolt, slide it out. Clean the clamp interface, the post itself, and the inside of the seat tube. Carbon seatpost? Use a light coat of carbon-assembly paste on the contact surfaces. Reinstall and tighten the clamp bolt snugly. Don’t over-torque carbon; most carbon-compatible clamps want 5–6 Nm, which is less than you think.
For the saddle, loosen the rail clamp bolts, slide the saddle out, clean the rails and the clamp faces, apply grease to the rails, reinstall. Tighten firmly. Ride and retest. This fix takes maybe 15 minutes total. That’s what makes saddle and seatpost checks so satisfying to us systematic types — quick, clean, and often exactly right.
When the Creak Still Will Not Go Away
You’ve checked pedals. Torqued cranks. Serviced the BB. Cleaned the seatpost and saddle. The creak is still there. Frustrating — but there are a few more places to look before you spend money.
- Headset under load: Stand and pedal hard. A creaky headset sounds like it’s coming from the pedals but lives at the front of the bike. Grab the bars and rock the front end — any play means the headset needs adjustment or fresh grease.
- Rear axle skewers or thru-axles: Make sure they’re fully tight. Loose rear axles creak rhythmically under pedaling load and they’re incredibly easy to overlook.
- Bottle cage bolts: I know. It sounds too simple. Check them anyway — a loose M5 bolt on an aluminum cage against a carbon frame will produce a creak that defies all logic.
- Frame flex on carbon: Some carbon frames creak at the seat tube junction or chainstays under hard load. There’s no home fix for this one. Frame replacement is the only real answer, which is a painful conversation to have with yourself.
If you’ve worked through this entire list and the creak is still there, two options remain: take the bike to a shop for a proper diagnostic, or go ahead and replace the bottom bracket. At that point, you’re not guessing anymore. You’ve eliminated everything else. That replacement is earned — and it’s probably overdue.


Stay in the loop
Get the latest cycle tech trends updates delivered to your inbox.