Why Your Derailleur Is Skipping in the First Place
Rear derailleur problems have gotten complicated with all the conflicting advice flying around. Adjust this, replace that, buy a whole new drivetrain — most of it is noise. As someone who was crouched over a Trek at 6 a.m. on a Saturday, watching the chain ghost-shift across the cassette before a ride I’d been planning all week, I learned everything there is to know about this particular nightmare. Today, I will share it all with you.
The chain was slipping under load, jumping teeth, dropping into the small ring on its own. “Frustrating” doesn’t come close. But here’s the thing — derailleur skipping almost always traces back to one of three culprits. Cable tension loss accounts for roughly 80 percent of cases. Costs nothing to fix. Limit screws drifting out of alignment cover another 15 percent. The last 5 percent? Worn chain or cassette. Metal that’s simply done.
Most articles online throw every possible fix at you simultaneously. That’s guesswork dressed up as advice. What actually works is triage — finding the real cause first, then solving it once. So, without further ado, let’s dive in.
Start Here — Cable Tension Is Usually the Culprit
Cable tension bleeds out slowly. Weather, grime, the basic physics of cable stretch — they all pull tension out of the system over weeks and months. When it drops far enough, the derailleur can’t pull the chain cleanly up the cassette. You get skipping under load. Hesitation between sprockets. That maddening half-shift that never quite lands.
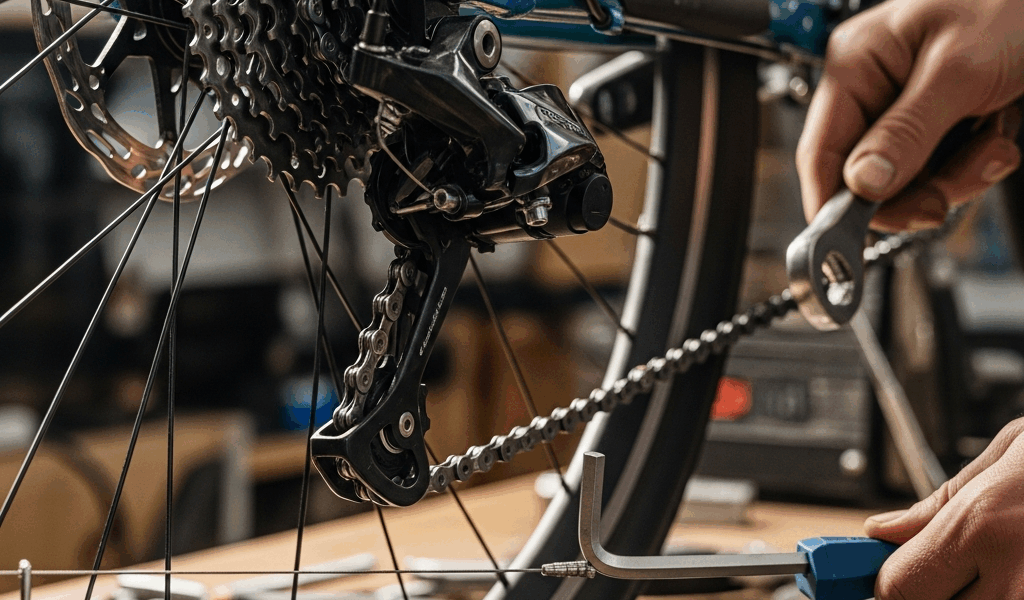
The fix lives on the derailleur itself. Find the barrel adjuster — it’s the cylindrical knob where the cable enters the derailleur body. Hard to miss once you know what you’re looking for. Some bikes, particularly those running Shimano or SRAM groupsets, also have inline adjusters on the chainstay or seat tube. They work identically.
Turn counterclockwise to add tension. Clockwise reduces it. That’s the whole mechanical truth of it — you’re micro-adjusting how tightly the cable pulls against spring resistance. No guessing involved.
Start with a quarter turn out. Shift to the smallest cog, pedal at moderate cadence, and watch. Chain still struggling? Another quarter turn. You want the derailleur snapping the chain into place without overshooting — decisive, not sloppy.
Pedaling while you adjust is non-negotiable. Static testing lies to you. I made “perfect” adjustments standing over the bike once — looked dialed in, felt dialed in — and the derailleur skipped the instant I put power down. Don’t make my mistake. The chain behaves differently under real load, and that difference matters.
Most riders solve it right here. If yours doesn’t, keep reading.
If That Did Not Work — Check Your Limit Screws
Probably should have opened with this section, honestly. Limit screws matter a lot. But cable tension fails more often, so it earns the first slot.
But what are limit screws? In essence, they’re small set screws that physically stop the derailleur from traveling too far in either direction. But it’s much more than that — they’re what keeps your chain from ending up in your spokes or jammed against your frame. The H screw (high limit) governs the small cog end. The L screw (low limit) controls the large cog.
How do you know if they’ve drifted? The skipping concentrates at the extremes of your cassette range. The chain won’t settle on the largest cog, or it can’t fully reach the smallest. Sometimes the derailleur rubs audibly even when you’re sitting centered on a sprocket. And critically — barrel adjuster tweaks didn’t help at all.
Here’s a visual test worth doing. Stand over the bike, look straight down at the derailleur pulleys, and shift to the largest cog. The upper pulley should sit almost directly underneath it — maybe one tooth off. That’s alignment. If the pulley looks like it’s in a different zip code, your L screw needs attention. Run the same check on the smallest cog for the H screw.
Adjust in quarter-turn increments only. Loosen the H screw a quarter turn if the derailleur won’t reach the smallest cog. Loosen the L screw if it hangs up on the largest. Test after every single adjustment — this is slow, precise work, and rushing it costs you more time than it saves.
Tighten instead if the derailleur overshoots. You’ll feel the resistance change in the screw. A quarter turn makes a visible difference. That’s what makes limit screw adjustment so endearing to us home mechanics — the feedback is immediate and honest.
Still Skipping — When the Chain or Cassette Is Worn
Cable tension is dialed. Limit screws are set. Still skipping. That’s when wear enters the conversation.
Chain wear is measurable — which is genuinely good news. A Park Tool CC-4 chain checker runs about $13 at most shops. Two pins, measures elongation directly. At 0.75 percent wear, replace the chain. At 1.0 percent, your cassette has almost certainly taken damage alongside it.
I’m apparently someone who ignores shark-toothing for three months and ends up paying $130 instead of $40, and that approach works for me while the smarter strategy never seems to kick in fast enough. Don’t make my mistake. A chain alone costs $30 to $50. A worn 11-speed Shimano cassette — one that’s been chewed up by a stretched chain — runs $100 to $150 to replace. The math isn’t complicated.
Cassette wear has a very specific look. Grab a flashlight and examine the larger cogs up close. Healthy teeth are symmetrical, almost square-shouldered. Worn teeth hook forward — they develop that distinctive curved profile people call shark-toothing, like each tooth is reaching toward the chainring. Once that shape appears, it’s irreversible. The cassette is done.
Hooked teeth can’t hold the chain cleanly under load. The chain skips because it literally cannot mesh the way it was designed to. No amount of barrel adjuster work or screw adjustment changes worn metal. This is the 5 percent scenario — and the only path forward is new parts.
Quick Checklist Before You Declare It Fixed
- Shift through every gear while stationary first. Clean response, no lag, no overshoot. That’s the baseline.
- Ride it — actually ride it. Find a gentle hill, shift across the full cassette range a few times under load. No skipping means you’re done.
- Check the cable anchor bolt where the cable clamps to the derailleur body. A loose bolt mimics cable stretch perfectly and will undo everything you just fixed.
- Lube the chain monthly during riding season. Check cable tension at the same time. Fifteen minutes of maintenance prevents this entire diagnosis from repeating.
Most skipping lives in the barrel adjuster. Work the triage, trust what you find, and you’ll be back riding — probably before that Saturday morning window closes.


Stay in the loop
Get the latest cycle tech trends updates delivered to your inbox.